I have got to a point with my photography that I am literally being inundated with questions about how I do some of my photos. I simply do not have time to answer them all in full individually anymore. It is seriously restricting the free time that I have to pursue this hobby and take those pictures that seem to have become so popular. So for my well being and hopefully to the benefit of those who ask me so many questions, I am doing this write up.
Saying to someone: “I love your photographs. You must have a great camera” Is like saying to a chef: “That food was delicious. You must have a great oven.”
 Not really a question to start with, but it might help some to see a list of the equipment that I can/have/will use to do my astrophotography.
– Canon 6D
– Canon 5D Mk II
– 14mm, 24mm, 17-40mm, 20mm, 50mm, 75-300mm, 90mm Camera Lenses
– 10″ F/4 Newtonian Telescope
– 80mm ShortTube Guidescope
– Synguider Autoguider
– NEQ6 Pro Goto Telescope Mount
– Vixen Poloarie
– Coronado PST (Personal Solar Telescope)
– Modified webcam for astrophotography
– Variety of telescope eyepeices, adapters and accessories
– Home made barndoor tracker.
– Three camera tripods.
Like I said- a LOT of money
How can I take photos of the moon with just a camera?


Get yourself a tripod. Learn to use your camera in fully manual mode. Use live view if you have it to manually focus on the moon. Use the longest focal length you have. Use settings of ISO 400, F/5.6 and 1/125th of a sec (crescent) 1/500th sec (quarter) 1/1000th sec (gibbous) or 1/2000th sec (full moon) as a starting point. Take a test shot and adjust the shutter speed to get the right exposure. Delay the shutter or use a remote to eliminate vibration.
How do you do your startrail images?


The best online tutorial I have seen will tell you everything you need to know and more http://www.naturephotographers.net/articles0509/fv0509-1.html
You can also use this http://www.startrails.de/html/software.html or this http://www.markus-enzweiler.de/StarStaX/StarStaX.html program to stack your images.
How do you photograph the sun without frying your camera and eyes?


I own one a proper solar telescope (Coronado Personal Solar Telescope) which is a perfectly safe way to view the sun and with the aid of a couple of adapters also allows me to photograph it.
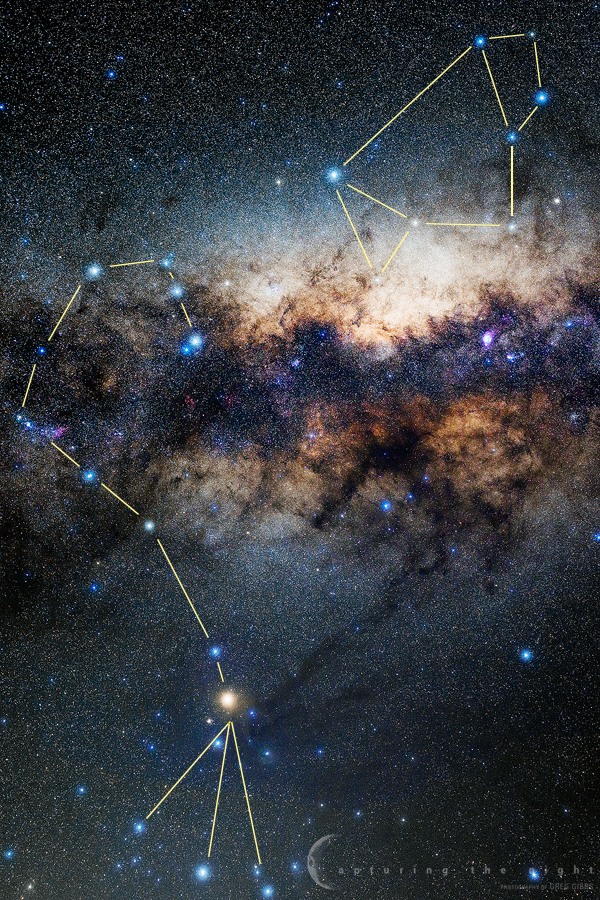
I want to buy a telescope and take photos of deep space objects like you do. What do I need?


This is a big question and one of the ones I get the most. You need to ask yourself what do you want to image the most (planets, other galaxies, nebulae, etc.). Each answer has it’s own list of equipment that is better than others. It’s not that you can not image everything with the one setup but some are more suitable than others.
It’s not all about the telescope. The mount is the most important aspect of astrophotography. Bad mount + great telescope = bad photos. Great mount + any telescope (or even just a camera and lens)= great photos. This is my deep space astrophotography setup…..

The mount cost nearly three times as much as the telescope. Expect to pay about $1,500 Australian Dollars to get the minimum good mount for deep sky imaging.
I can highly recommend purchasing this http://www.astropix.com/BGDA/BGDA.HTM
I can highly recommend joining a local astronomy club to try before you buy and learn from people already doing it.
I can highly recommend joining online astronomy forums like “Cloudy Nights” or “Ice In Space” and asking lots of questions.
I can highly recommend subscribing to astronomy magazines
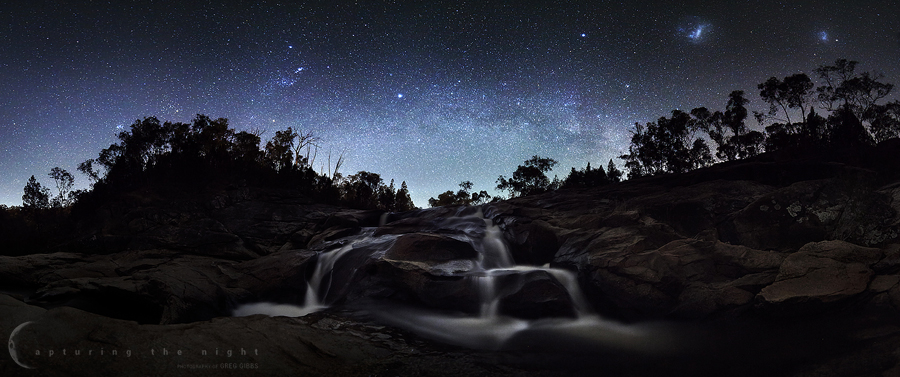
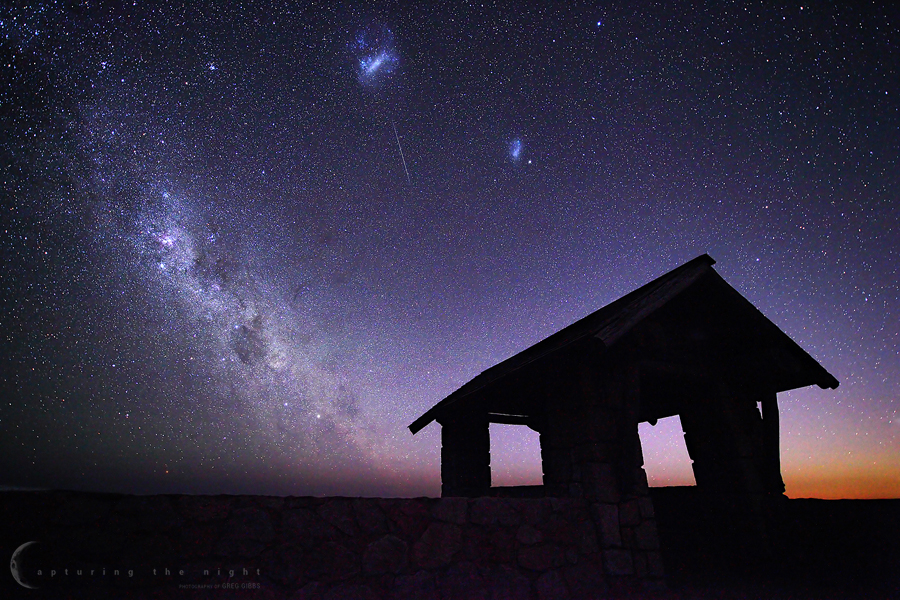
How do you do your landscape astrophotography or what settings did you use?


It does not matter what settings I use unless you have exactly the same equipment I have and are standing next to me in the same conditions. If you dialed in the same settings that I have used I can almost guarantee that 99 times out of 100 that you will get an image that looks nothing like mine or you wouldn’t even be able to use the settings because your equipment does not allow it.
To work out what you can do with your equipment check out my other blog post here……
http://www.capturingthenight.com/blog/?p=12
Once you fully understand the 600 Rule all your other camera settings will flow off that for fixed tripod astrophotography. If you don’t like what the 600 Rule says for your equipment- buy better equipment. That’s what I did.
I can highly recommend you buy this eBook http://harvestinglight.net/seeing-the-unseen/
And/or this eBook as well http://www.philhart.com/shooting-stars
Get outside at night and practice, practice, practice. Learn the night sky. Not all the night sky is as photogenic as some areas. Get as far away from light pollution as you can.
I have purchased all the equipment you have, and I have read all the resources you have, and I have my images but they still don’t look anything like yours. What do I still need to do?
Image processing is vital to astrophotography. It is not a hobby to take up if you have an aversion to using image editing programs. For deep sky images you can easily spend as much time processing the images and digging all the faint detail out of the data, as you did outside taking the shots. Watch this YouTube vid http://youtu.be/BBQQ_Gs6YHM to see a very good tutorial on basic deep space astrophotography image processing . A lot of the techniques used can also be applied to landscape astrophotography.
I am constantly learning and refining how I process my images and I will only stop learning the day I die. One thing I have seen come up a lot lately is the word Photoshop. As in comments like “Fake. I believe that this image has been photoshopped”
Photoshop seems to have become a bit of a dirty word in terms of photography for some people. It has become a term for compositing or faking images.
Do I use Photoshop to paste a stolen or computer generated star filled sky image over my own landscape shot? NO, I do not.
Do I use Photoshop (or Lightroom, or Camera Raw, or Digital Photo Professional, or PTGui Pro, or one of the multitude of other image editing programs available) to edit my images. Of course I do. And unless you are using a film camera, you do too. Even if you are just taking a jpeg digital image straight from the camera to your computer, the data has most likely already been edited by your camera and does not represent exactly what you saw with your own eyes.
If I use an image editing program to crop, straighten, White Balance correct, saturate/desaturate, sharpen, apply/remove vignette, adjust exposure or contrast, etc. is that “Photoshop”? In my opinion, no. They are standard actions which have been applied by photographers ever since the first picture was developed in a darkroom. Image editing programs like Photoshop are, for me, just a digital darkroom in which I develop my images.
Everything you see in my images is captured by me and my camera and more often than not, in a single exposure. The only exceptions to this are generally my startrail images (where I stack multiple images to show the stars motion across the sky), my solar images (where I do one exposure for the surface of the sun and one exposure for the fainter prominences around the solar limb), my panorama images (where I stitch multiple single images together to capture a larger field of view), and my deep sky images (where I do a number of exposures to improve the signal to noise ratio). When ever I do do multiple images I always declare so in the image description. If I have not mentioned multiple exposures then the shot was all done in a single image.
Steven Christenson has a great online article in which he talks about his thoughts on image processing and composite images and it echoes my thoughts exactly. Check it out here… http://blog.starcircleacademy.com/2012/05/bending-reality/
Well I hope this has helped set you on your way to doing astrophotography like I do. From now on if anyone asks me how I did a shot I will simply be directing them to this blog (if I have not already described how I did it in the description). I will NOT be expanding on anything I have talked about here unless I feel the need. You now have the resources I used to get going in this. What you do with them and how far you want to go with it is up to you.
Cheers
Greg
 Harvest Sky
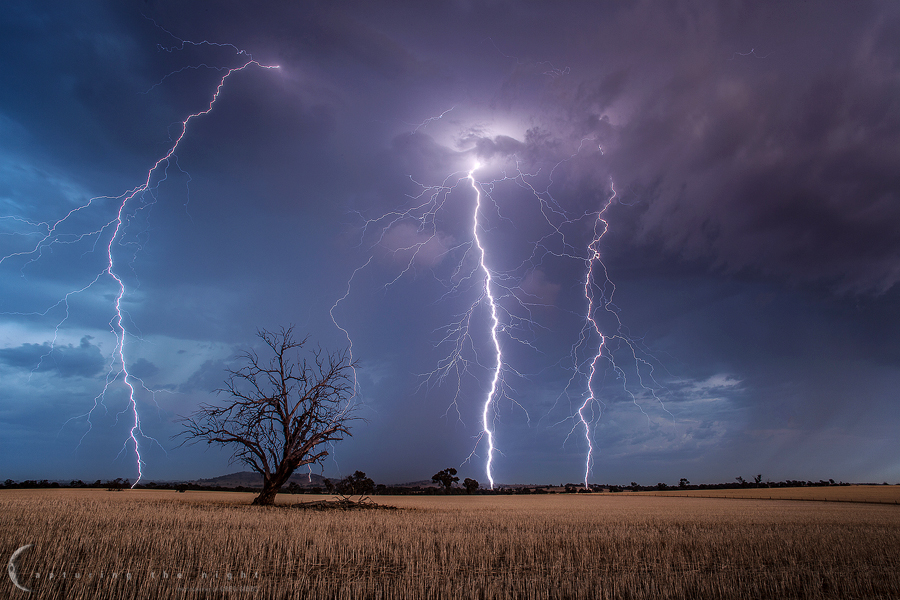 Fly Me To The Moons
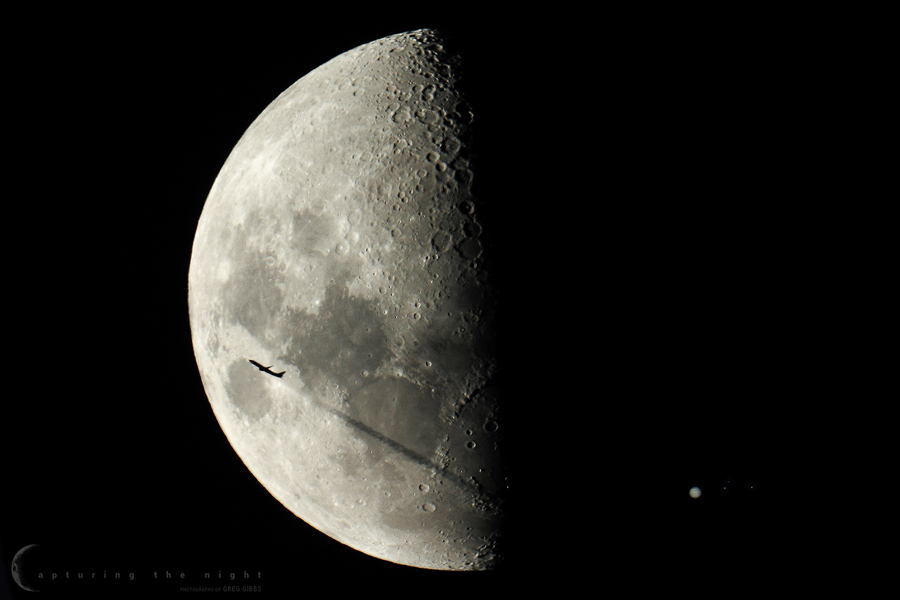 Lookout
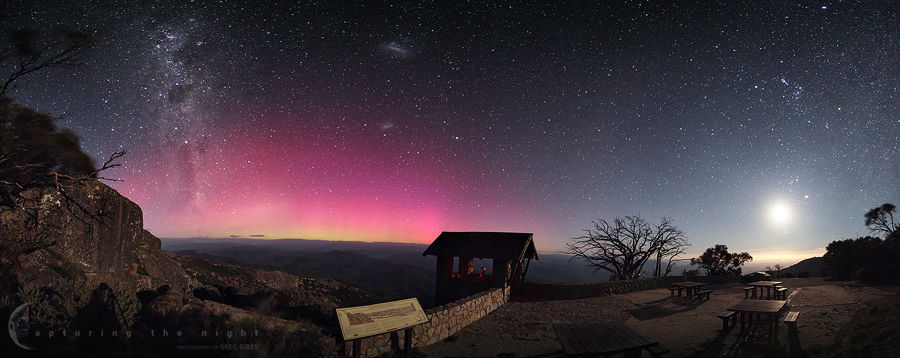 Crater Lake Boat Shed
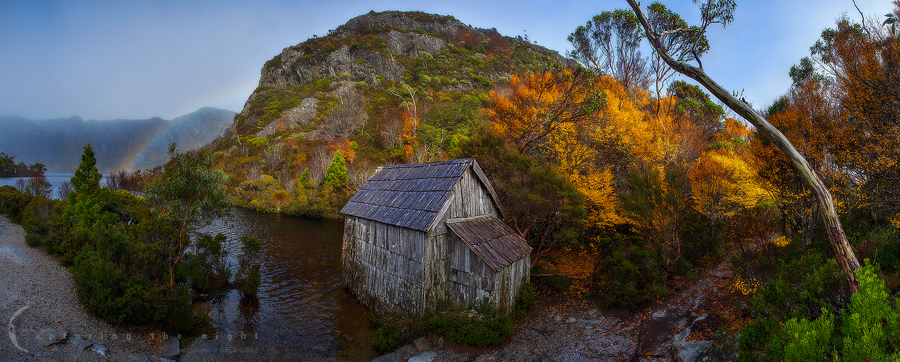 Tranquility
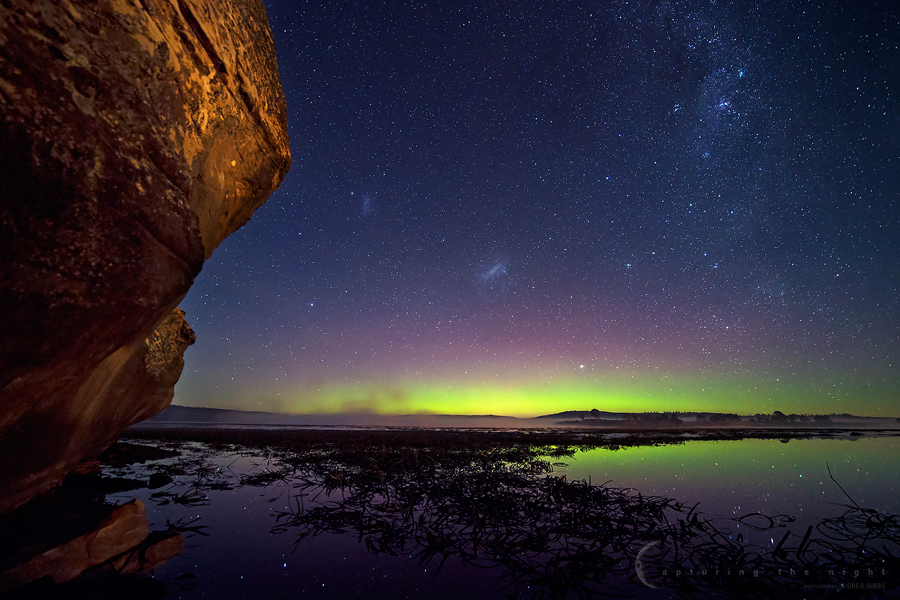 Cascade
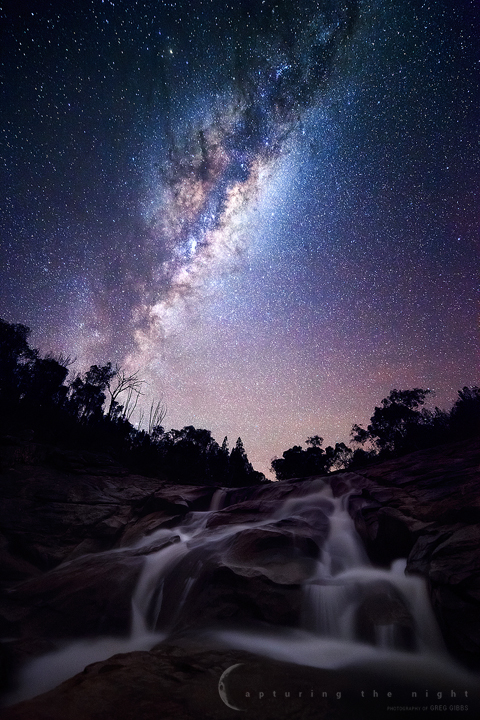 Thunder Valley
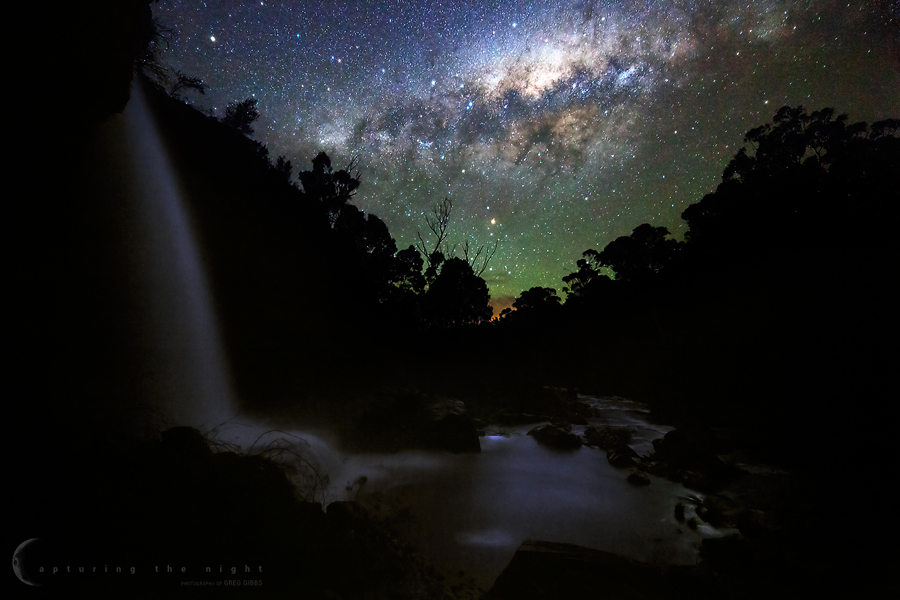 Field Of Dreams
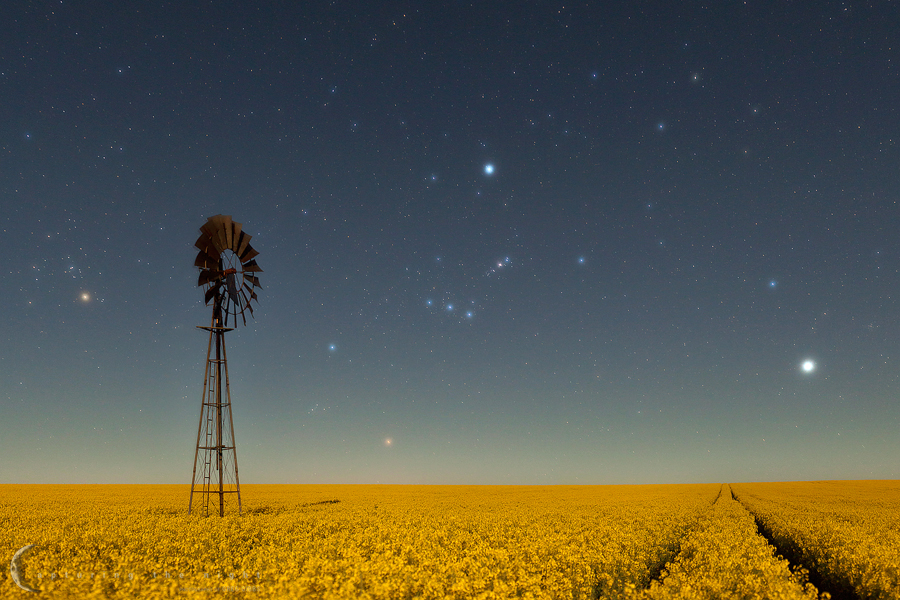 Diving In